
Setting up Primechat is straightforward. You can launch your first chatbot within minutes thanks to its intuitive drag-and-drop interface.
Primechat is an industry-leading AI-powered chatbot builder designed to transform customer engagement and automate various business processes.
In this section, you will learn:
How to register
Platform overview
Workspaces & members
How to set up your bot in each channel
Integrations overview
Ecommerce system overview
How to upgrade your account
To begin the process of creating your own chatbot, you'll need to register with PrimeChat. The platform is built with robust administrative features and uses high-grade security that complies with all regulatory mandates, so data is secure and safe.
Workspace Name refers to your company's name or name of a project/team while Name is the name/alias of a person.
Fill in all the fields, tick "I Accept" after viewing the terms of service and click "Register". You will then receive a verification email from PrimeChat, click on the button to verify your address.

Fill in your account details to log in. Once you’re authorized you will get to your account dashboard.

1 Sidebar
1.1 Dashboard
1.2 Bots
1.3 Analytics
1.4 Template Store
1.5 Integrations
1.6 Mini-Apps
1.7 Ecommerce
1.8 My Contents
1.9 Workspace Settings
1.10 Billing

Once you register and log in, your dashboard will look like the above.

The dashboard shows you an overview of your workspace (team). Click the three buttons at the bottom for linking to our Facebook Community, YouTube Channel and Documentation.
Currently, PrimeChat supports 12 types of channels. Facebook, Instagram, Telegram, Slack, WeChat, WhatsApp, SMS, Voice, Google, Line, Viber and Vk. For help creating your bots, please check the documentation: Setup & Create Bot.
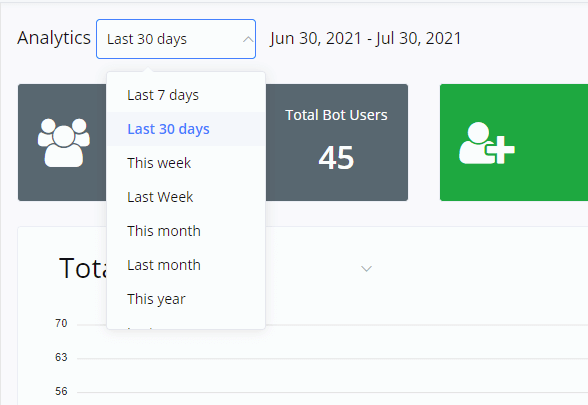
Check analytics data here. You can click the "Last 30 days" dropdown list to adjust the period.
The template store lists all publicly shared templates across the system. All PrimeChat users can publish their templates and install others' templates here.
Here is where you manage all your integrations including your phone numbers, installed mini-apps, and other third-party services. Check the "Integration" section detailed guidance.
Mini-Apps store lists all publicly shared mini-apps across the system. All PrimeChat users can publish their templates and install others' mini-apps here.
Ecommerce section is for managing an e-commerce system for the whole workspace. Your products information can be used across all channels and all chatbots. Also, orders from any channel and any chatbot will be listed here.
Workspace settings allow you to edit workspace profiles, and manage all the members in your workspace as well as the channels settings
The "Billing" page is where you manage your subscription. You will see your current subscription status and a usage rate bar here.
This section will give you an overall idea about how to use the PrimeChat.ai flow builder.
You can open a flow and try side by side when you learn it.
💁 Please make sure you go through every detail on this page before you start building bots.
Flow Type
To begin with, you need to create a flow. Currently, Primechat provides you with 11 types of flow:
Once you've set up your bot and created a flow, check theses guidelines on how to build that flow to send your first message
How to create a chatbot in omnichannel
How to connect channels to omnichannel
How to create an omnichannel flow
Use conditions to determine where the user is coming from
How to determine which channels support which features?
The workspace is to be seen as a team while members/users are the people working in the team.
A workspace can have many members, and a member can join many workspaces in different roles
Generally, a workspace is designed for one business, and it organizes all the resources for the business, such as payment accounts, email sender profiles, product information, etc.
Each workspace has it's own billing and limitation on members, bot users and bots amount (fees applied for flexible add-ons)
1 workspace can connect to:
1 omni bot (8 channels)
1 Open AI account
1 Facebook account
1 Google account for Google My Business
1 Google account for Google Sheet
1 Google account for Gmail
1 Google account for Dialogflow
1 Intercom accountonly 1 Stripe account
1 PayPal account
Cloudinary account
1 Calendly account
1 MongoDB Cloud account
1 Twilio account
1 SignalWire account
1 Message Media account
1 SendGrid account
1 MailChimp account up to 10 SMTP profiles (SMTP email sender)
Moreover, one workspace can download each mini-app only once.
For example, you download a WooCommerce mini-app and connect your workspace to a WooCommerce account, you are now unable to download it again for connecting another WooCommerce account.
Unless the app developer design it to be connecting more than one account.
Important - You are allowed to connect your workspace to only one Facebook/Google(for Google My Business) account but you can create bots for more than 1 Facebook Page / Google Business.

You can connect to any Facebook Page / Google My Business and create bots for them as long as you are the owner/admin of those pages / businesses.
When you connect to your Facebook/Meta account, make sure you select all the pages that require management and there you go.
For example, if you wanted to build bots for your clients, simply have your clients invite your Facebook account to be an admin of their Facebook pages.
Same for Google My Business, have your clients invite your Google account to be an admin of their businesses and then you can build Google bots for them.
Should I use different workspaces for different businesses?
It's of your own choice

Workspace Profile (Timezone)
To edit the profile of your workspace, click Workspace Settings and profile in the above screenshot.
You can change your logo, workspace name, timezone and default flow theme.
TIP - The timezone setting of a workspace will affect how your bot process time value.
For example, the system value "BOT_CURRENT_TIME" is different when you have different timezone settings.
Moreover, system value "NOW" and "TODAY" is based on bot users' timezones, if they don't have a timezone in profile, workspace timezone is used.

